
Weaving Rainbow Hearts (Updated 9/25/25)
- Evanita W. Montalvo
- Sep 3, 2025
- 10 min read

Through my journey weaving with Penelope, I try to learn new techniques with each new pattern I try.. I came across these cute little hearts in the Braids and Bands Facebook group, posted by Cerelle Woods—the original pattern by Mari Voipio. I may have bitten off more than I could chew, as there have been a lot of hiccups along the way. Part of these How to Blogs is to help ensure everyone is off to a good start on their projects, and hopefully, this one will help you all avoid some of the little snafus I ran into.
Pattern Drafts
As I started this journey, I followed the pattern draft I found on the FB group and the instructions. I had everything warped up, but the pattern just wasn’t forming. I checked and checked to make sure I warped everything correctly. I also thought of comparing it to the draft available on Twisted Threads, as it takes the draft and shows you exactly how it will weave up. As soon as I compared the two drafts, it hit me that the pattern was drafted A, B, C, D, while Twisted Threads patterns are drafted D, C, B, A.


So what difference does that make? Well, in the case of this pattern that has all forward turns, I had to switch to all backward turns in order for the pattern to form. Another thing I noticed on the draft was the slant of the threads vs what was labeled at the bottom did not match up. For some drafts, S and Z can apply to the yarn slant rather than the card slant. This pattern was displaying both which definitely added to the confusion.
Draft formatting can vary, and the way the letters on cards can vary as well! There isn’t a universal way of drafting tablet patterns, so it’s good to keep this in mind. The 3D Printed Daedalus cards are set up the same way as Twisted Threads, so when in doubt, you can always draft up your pattern there to verify in advance that it will work as planned or whether you’ll need to make adjustments.
Starting Point Can Matter
After sorting out the pattern draft problems, I got to weaving and noticed that my weft was not catching the outside edges of the band. I learned that the side your weft enters at the start can affect your weaving. After unweaving and starting over, I switched the side I entered for the weft, and like magic, everything clicked into place.

Idling Tablets?
This pattern has tablets that idle. When a card idles, it means that for that pick, it remains in its current position. The tablets are separated into two groups: Odds and Evens. Each pick for this pattern has either Odds moving forward or Evens moving forward. There’s a catch, though! Tablet number 15 is treated as an even number. To help make it easier to separate the tablets, I used white tablets for odd and black tablets for evens (plus 15).

Grouping tablets
Since this pattern has two distinct groups of cards, Evens+15 and Odds, to make it easier to rotate your cards, you can slide the groups so they are staggered from each other. This can make it easy to rotate the groupings as well as compare the position of the groups to know which group needs to rotate next.

Pattern Information
Tablets - 15 Square Tablets (7 in one color and 8 in a different color)
Colors - Black (background) and Rainbow (hearts)
Warp Threads - 39 Black and 21 Rainbow
Twist - The pattern is not twist neutral
Threading Chart -

Weaving Instructions - You will start with D, A at the top of the cards with A nearest you. Starting with pick 1, rotate all EVEN cards plus 15 forward (odds except 15 will idle). On the next pick, rotate all ODD cards except 15 Forward (all evens plus 15 will idle). Continue this pattern, always rotating forward. Remember that the with the first pick you will be entering the warp from the left.

Twisted Threads Link - https://twistedthreads.org/pattern/cuuKT7x47ki9imd8o
Dealing with Non Twist-Neutral Patterns
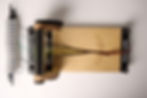
In order to remove twist as it accumulates, the warp will need to bypass the Warp Beam. To do this, the warp will be secured through the back clamp. Small bobbins such as Beadsmith Bob-EEZ Cord Management bobbins, are a great way to keep your warp manageable for this type of weaving. The following information is what worked for me to help manage the twist.
Back Clamp Tips & Tricks
Seating the top of the Back Clamp backwards can make it easier to adjust each tablet’s tension.

When adjusting the tension, secure the Back Clamp gently so that thread bundles can be pulled, but still secure enough that once pulled, they are still somewhat secured. Start on one side, pulling each bundle and holding them taut. Once you’ve done one half, tighten down that side’s knob. Continue to pull the thread bundles taut on the other side, and then tighten down the knob. Test the clamp’s tightness by gently pulling a bundle to see if it moves.


Check the tautness of the warp to ensure that all bundles are evenly tensioned.

Sometimes individual threads need to be tightened.
Be careful not to pull too hard, as this can risk snapping threads
Removing Excess Twist Tips and Tricks
Before releasing tension on your project to advance your warp or remove excess twist, always secure cards with at least one large safety pin.

Loosening the front clamp to allow a small amount of slack helps when moving the twist past the Back Beam.

Using a needle or metal double pointed needle can help with moving the twist. I did this card by card, as attempting to do multiples can make it harder to move the twist back.


Twist can be displaced between the back of the Back Beam and the Back Clamp. I found I could do this for a few repeats to prolong having to release the Back Clamp to deal with removing the twist. The number of repeats you can do before having to undo the twist will depend on your pattern, yarn, and the distance between your finished weaving and the Back Beam.

It can be helpful to use a rod to keep bobbins organized and easy to manage, but when removing twist, you’ll need to remove them from the rod and manage the twist on each bobbin individually.


Using the Raddle can help section out your bundles for easier management when dealing with twist removal. Once the raddle is not needed, it can be rotated out of the way to the bottom of the Back Beam. After removing the twist, make sure all bundles are taut before fully securing the back clamp.


Rainbow and Color Repeats
For this pattern, I wanted to make the hearts a graduated rainbow. There are two ways to accomplish this, depending on the look you want. The easy route is to make each tablet that makes up the hearts a single color of the rainbow. This would provide a side-to-side rainbow on each heart. The look I wanted was for each heart to be a solid color and transition slowly from one color to the next. To achieve this look, you need to find a yarn with color repeats.
I tested two different rainbow yarns, the first being Aunt Lydia’s Crochet Cotton # 10 and the other Lizbeth Threads Size 80.

The following are the steps I took to set up this warp. It can take quite a bit of time to get it just right but remember warping is half the project.
Step 1: Determine the length of a full color repeat. For the Size 80 thread, the full rainbow is approximately 56 inches.

Step 2: Determine the length you want to weave, keeping in mind the number of color repeats that will occur within that length. You’ll want the end of the warp to be just before the start of the color repeat to make cutting the lengths easier. I needed at least 112 inches of finished weaving, so I decided on 3 full repeats (56*3=168), which gives me plenty of extra to account for the waste in the warp. The waste in the warp is the areas that cannot be woven, such as the small portion at the start of the warp, along with the last bit at the end of the warp.
Step 3: Cutting and matching up the lengths. When cutting the warp threads, align the next length as best as possible to coordinate the colors. There will be some slight inconsistencies where some colors may start a wee bit earlier, later, or even a section where the color is not quite the same. You can choose how you wish to handle this. I had some issues with some of the yellow sections being a bit muddy with the crochet cotton, so I intentionally removed the lengths where the colors were less desirable.


Step 4: Match up lengths for each tablet. My first attempt with crochet cotton # 10 I wound the length between two Clampy Kates to observe how the colors matched throughout the length to ensure I was happy with the transitions. For the size 80 thread, I opted to wind the thread onto sample cards. Once ready, I wound the end of the bundle onto a bobbin, keeping the yarn taut to ensure threads remained aligned.

Step 5: You’ll need the raddle installed when setting up the warp on the loom. Place each thread bundle in its corresponding slot on the raddle and drape it over the bottom of the back clamp. Once all thread bundles are in place, lightly clamp down the back clamp.
Step 6: Pull all bundles towards the front of the loom.

Step 7: Thread each bundle into its corresponding tablet as instructed by the pattern draft. I made all odd-number cards white and all even-number cards(plus 15) black to make separating the idle from rotating cards easier.

Step 8: Once all the tablets are threaded check each bundle, line up the colors, and secure it with a knot as close to the end as possible.
Step 9: While holding a group of 3-5 bundles together, view the color changes and pull bundles either forward or backward to ensure colors are lined up as best as possible. Once satisfied, tie the group of bundles together. I tied the 3 black bundles on either side and then divided the rainbow into a 4 and 5 grouping. Viewing the back of the loom can help with alignment.

Step 10: If needed, you may need to adjust individual strands. For bobbins with individual strand adjustments, you’ll want to rewind the bobbin after you’ve got the warp set up to pick up any slack that was created.
Step 11: Once satisfied with the color transitions, tie a knot at the beginning of the warp.
Additional Tips & Tricks
When using finer yarns using scrap yarn to start off with can make it easier to transition the width to the width needed. For this pattern I used scrap yarn for a whole heart repeat. In addition to helping with the band width the use of the scrap yarn to secure everything into place can help with refining the tension on the back of the loom before starting to weave.

Finer yarns can tangle easily and accidentally create little slip knots if the yarn gets extra twisty. This can cause potential issues with the weft that can be easily remedied by using a needle to keep it from twisting on itself as you are pulling it.


For holding these bobbins, I like to use a rod that I can place Akerworks Tensi Tamers on to secure the bobbins safely in order.

Thoughts on Yarn

Aunt Lydia’s Crochet Cotton # 10
It weaves up beautifully and is very easy to work with. I did find that the color repeats were not quite as accurate as I would like, with some of the spacing being a wee bit off or the color being slightly off in particularly with the yellow, which was not as bright a yellow as I had hoped, and some yellow sections were a bit muddy. Since you are cutting each warp thread, you can easily remove sections as needed.
Lisbeth Threads (Size 40 and 80)
This thread is awesome to work with. I’ve used size 40 for shoelaces and 80 for shoelaces with patterns that are a bit too wide to weave up on size 40 thread. The colors are vivid, and the repeats are extremely consistent. Lisbeth comes in a variety of sizes. I’m planning to get all sizes in the future to have a better grasp of weight comparison with other weaving yarns. Lizbeth comes in smaller balls than Aunt Lydia’s, but the quality and wide color selection make them totally worth it.
Indie Dyed Yarns
I'm still exploring this route but it's definitely a fantastic possibility! I commissioned a rainbow silk (50/2) from Hook & Shuttle and I'm eager to work with it after I finish my size 80 band. I've not woven with silk on Penelope yet but I'm eager to see how beautifully this will weave up.


That’s a Warp… I mean Wrap
I hope that this information helps anyone who would like to play with this pattern, as well as play with yarns that have color repeats. There are so many things you can do with yarns that change colors over time. I’m contemplating rainbow sheep; they would be so adorable!
I learned a lot over the course of tackling this new-to-me pattern, and I hope that you can learn from the bumps I had along the way to have a much smoother journey. If anyone has any questions regarding this post or any other Penelope weaving questions, please do not hesitate to ask by leaving a comment on this blog post.
Stay tuned for more helpful weaving blogs for Penelope in the future.
Happy Weaving!
Evanita

Updated 9/25/25
The shoelaces are finished! I originally used clear heatshrink, but I was not satisfied with the results and wanted something that looked more polished. I'm exploring metal aglet options.


